|
Routines |
| Prev: A1FF | Up: Map | Next: A234 |
|
Used by the routine at TestPlayerProgress.
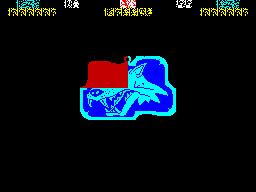
Clears the play area and draws the amulet in the middle of the screen. The amulet is drawn as four graphics, one for each piece. Every piece is drawn as a plain red silhouette, unless it has been collected, in which case it is drawn in full colour. Each of the graphics is drawn by DrawRoom_Process, which holds two sets of attributes for each graphic, the second of which is only used when AttributeSetFlag is set.
Once the amulet has been drawn the poem is shown by HandlerPoems.
|
||||||||||||
| ShowAmulet | A207 | CALL ClearPlayArea_Attributes | Clear the attribute buffer of the play area. | |||||||||
| A20A | CALL ClearPlayArea | Clear the play area. | ||||||||||
| A20D | LD A,(IX+$0B) | Fetch the amulet pieces collected from 970D. | ||||||||||
| A210 | LD C,A | Stash the amulet pieces collected in C. | ||||||||||
| A211 | LD HL,$C374 | Point HL at the table of amulet graphics and positions at AmuletGraphicsTable. | ||||||||||
|
Draw each of the amulet pieces in turn.
|
||||||||||||
| ShowAmulet_Loop | A214 | LD E,(HL) | Fetch the address of the next graphic from the table into DE. | |||||||||
| A215 | INC HL | |||||||||||
| A216 | LD D,(HL) | |||||||||||
| A217 | LD A,E | Jump to HandlerPoems if the end of the table has been reached (the address is zero). | ||||||||||
| A218 | OR D | |||||||||||
| A219 | JR Z,HandlerPoems | |||||||||||
| A21B | INC HL | Move onto the position of the graphic. | ||||||||||
| A21C | SRL C | Shift the collected flag for this amulet piece out of C and into the carry flag. | ||||||||||
| A21E | JR NC,ShowAmulet_Draw | Jump to ShowAmulet_Draw if the amulet piece has not been collected. | ||||||||||
| A220 | LD A,$01 | Write 01 to AttributeSetFlag so that the graphic is drawn in full colour. | ||||||||||
| A222 | LD ($96B2),A | |||||||||||
| ShowAmulet_Draw | A225 | PUSH BC | Stash the amulet pieces remaining on the stack. | |||||||||
| A226 | LD C,(HL) | Fetch the position of the graphic from the table (C is the X position and B the Y position). | ||||||||||
| A227 | INC HL | |||||||||||
| A228 | LD B,(HL) | |||||||||||
| A229 | INC HL | Move onto the next table entry. | ||||||||||
| A22A | PUSH HL | Stash the table pointer on the stack. | ||||||||||
| A22B | LD H,B | Copy the position to HL. | ||||||||||
| A22C | LD L,C | |||||||||||
| A22D | CALL DrawRoom_Process | Draw the graphic of the amulet piece. | ||||||||||
| A230 | POP HL | Restore the table pointer and the amulet pieces remaining from the stack. | ||||||||||
| A231 | POP BC | |||||||||||
| A232 | JR ShowAmulet_Loop | Jump back to ShowAmulet_Loop to draw the next amulet piece. | ||||||||||
| Prev: A1FF | Up: Map | Next: A234 |